
Overview
Once you have added an Episode in Jetstream Studio, you can use the Language features to add captions and translations to the video or audio you are creating. If you haven’t already done so, review the Add a New Episode instructions first. (See the link at the bottom of the page.)
How to
Add Captions
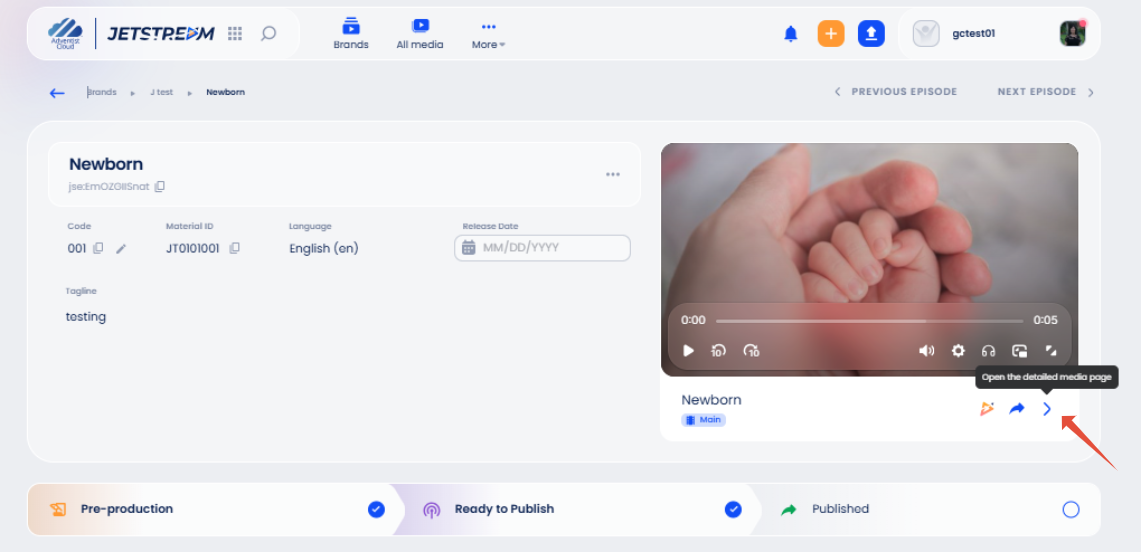
- From within an episode with a video or an audio uploaded, Open the detailed media page by clicking the right-angle bracket to the right under the video file.
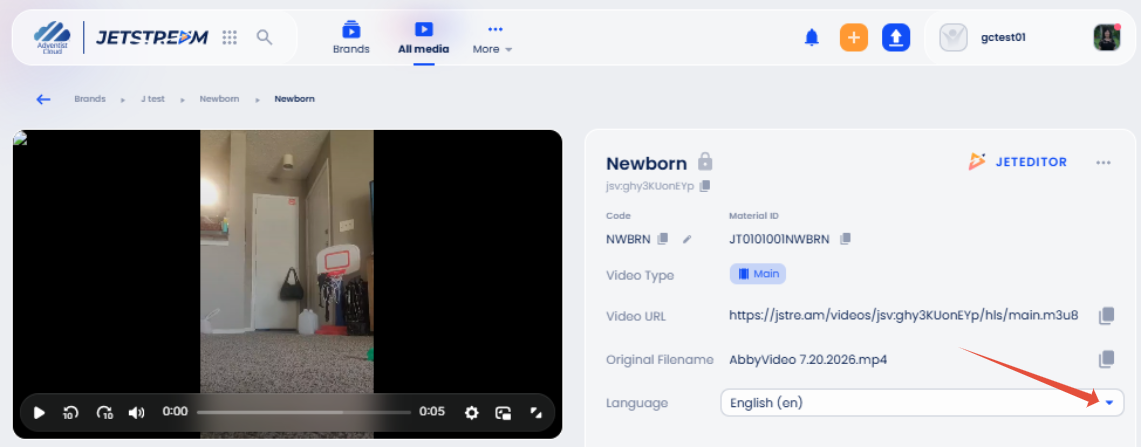
- Make sure the original Language is set correctly on your episode before you generate captions.
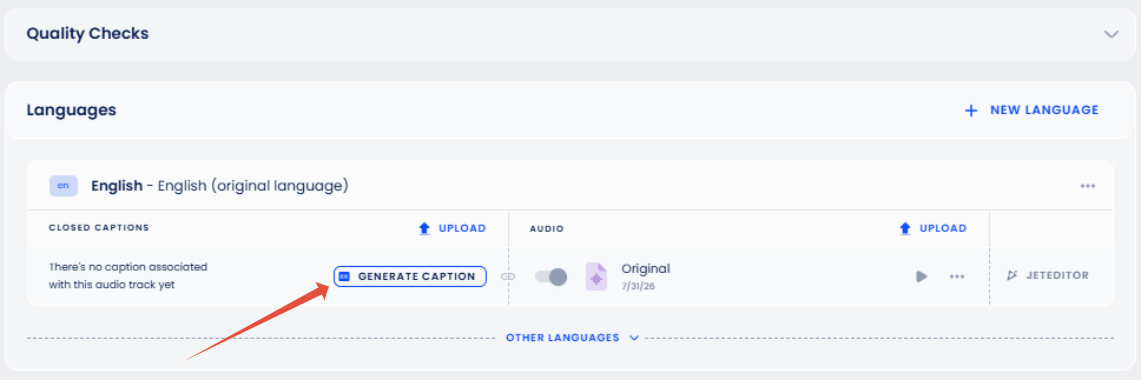
- Scroll down to Languages.
- Click on the button Generate Caption. It will say: Waiting, then Processing until it only says Generated.
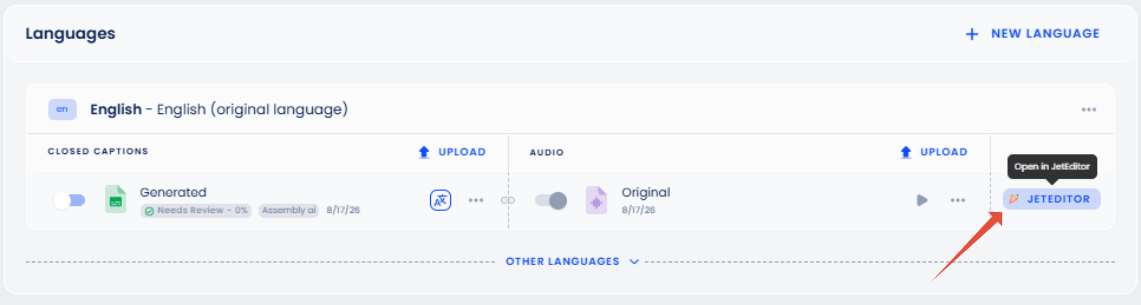
- Click the JetEditor button on the right side, which will open the file a new tab.
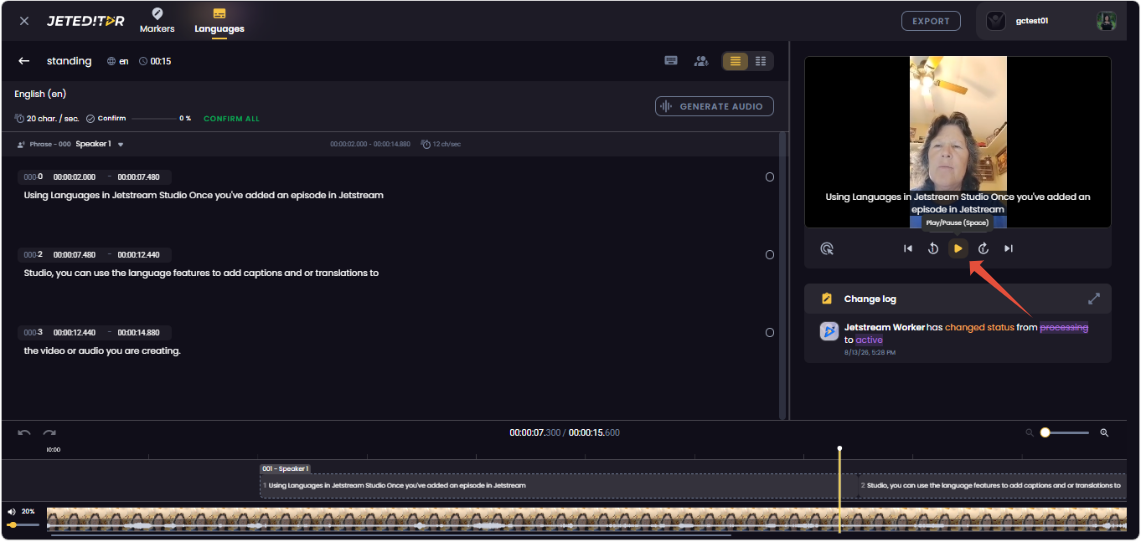
- The left side will display the transcription with the timing.
- If you press the Play icon under the main video or audio on the right side, you will see the captions (subtitles). The system creates the transcription and places it on the video at the correct time.
- On the left side, you can click on a phrase and edit the transcription to correct any mistakes.
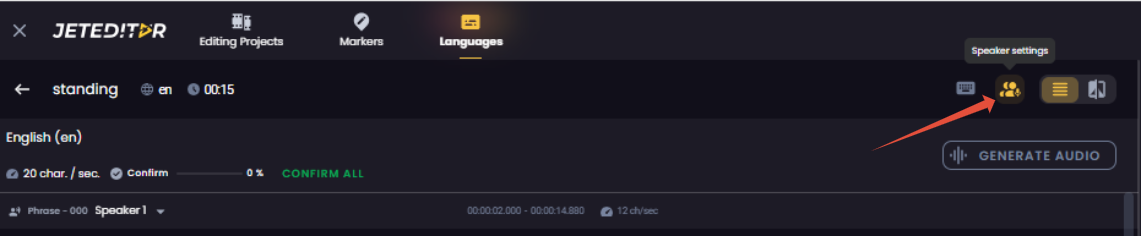
- Next, you will assign the correct person to Speaker 1. Select the Speaker settings icon on the upper right.
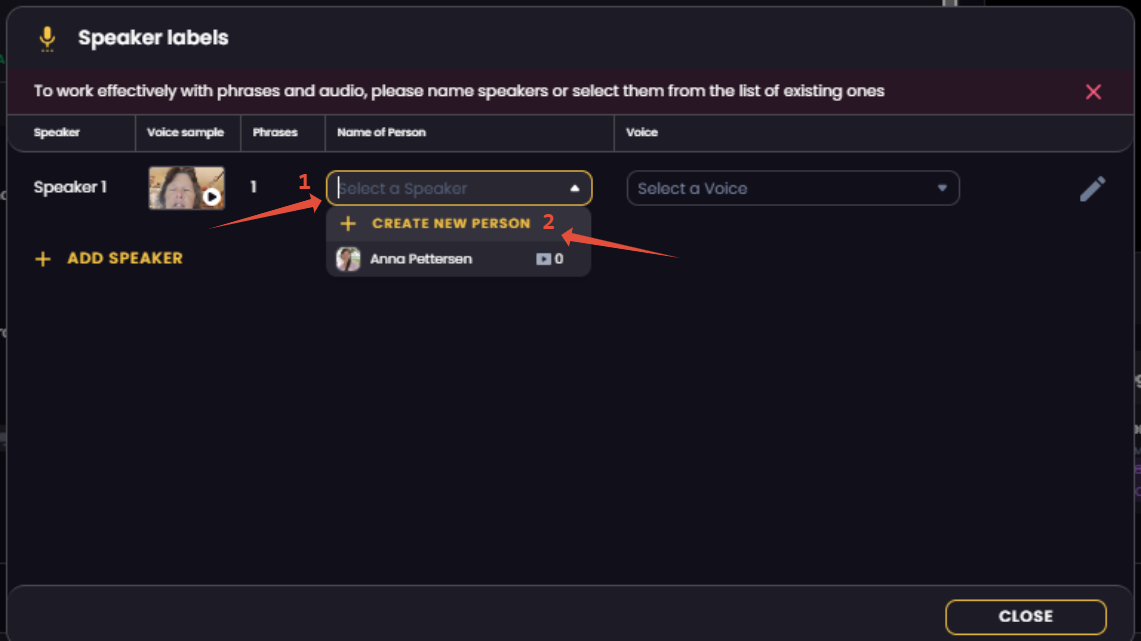
- In the Speaker labels modal box, across from Speaker 1, expand the Select a Speaker link.
- Choose the Create a new person link if needed.
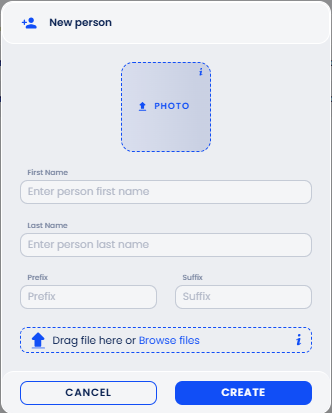
- The People page will open.
- Fill in the New Person modal box that appears and click the Create button.
- You can close the People page and return to the JetEditor page.
- Now you can return to the Speaker Labels modal box. Click on the Select a Speaker link again and choose a speaker.
- You can Select a Voice.
- Then click the Close button on the Speaker labels modal box.
- You can close the tab of the JetEditor and return to the detailed media page.
Add a Translation
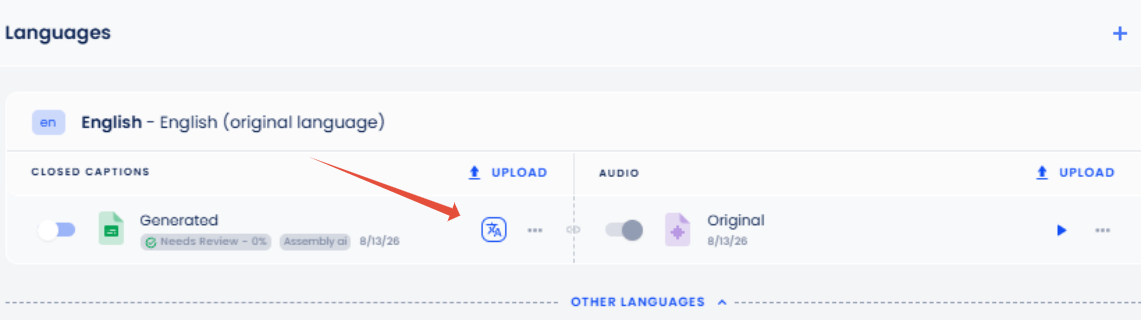
- In the detailed media page of an episode, click on the Translate icon under English (original language).
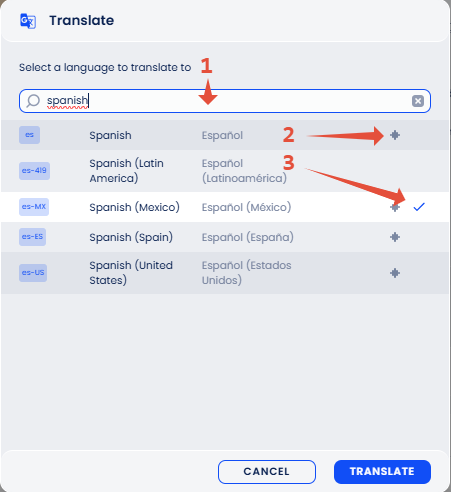
- In the modal box, Select a language to translate to. You can fill in a language in the field or scroll through the list and click on the language of your choice.
- A diamond symbol appears to the right of the language if it is available for voice dubbing.
- A blue check mark will appear next to your choice.
- Then click the blue Translate button.
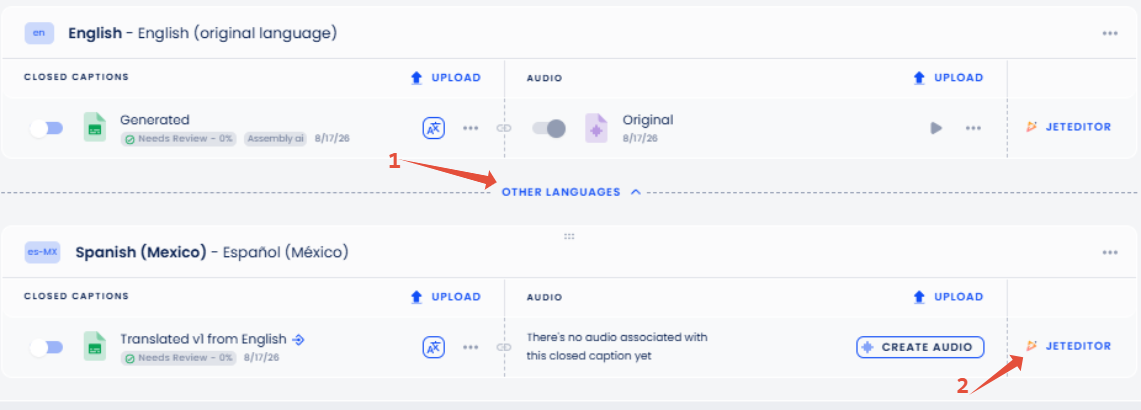
- Expand the Other Languages link below English (original language), and your new language will appear.
- Wait until: Processing (loading) has finished. Then it will say: Translated.
- Now you can click on the JetEditor link on the right of your translated language. It will open the text that it translated from English.
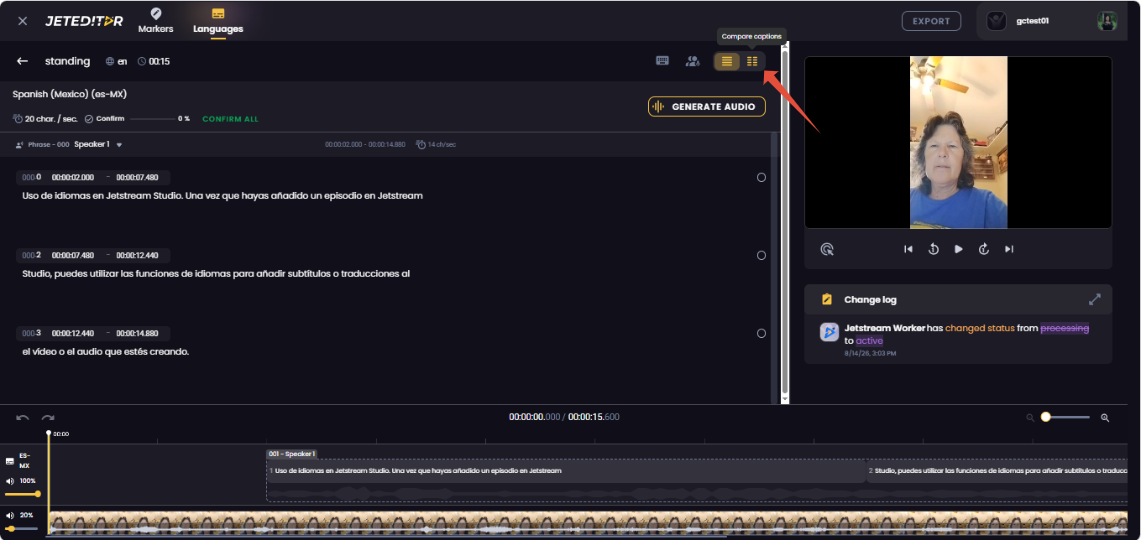
- On the upper right of the captions, you can click on the Compare Captions icon.
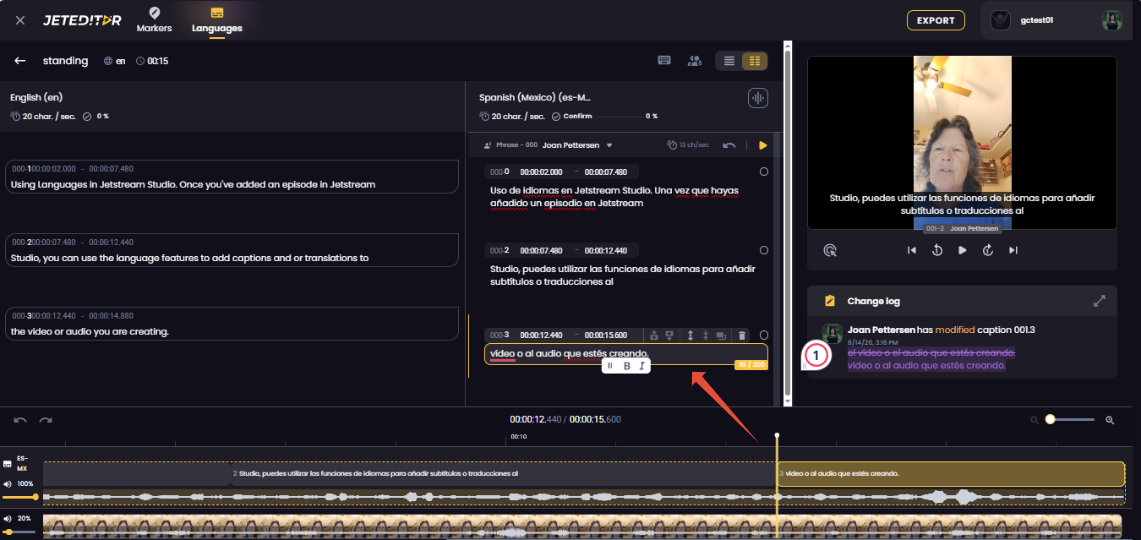
- You will see the original transcription and the translation side by side. You can edit a phrase by clicking on it.
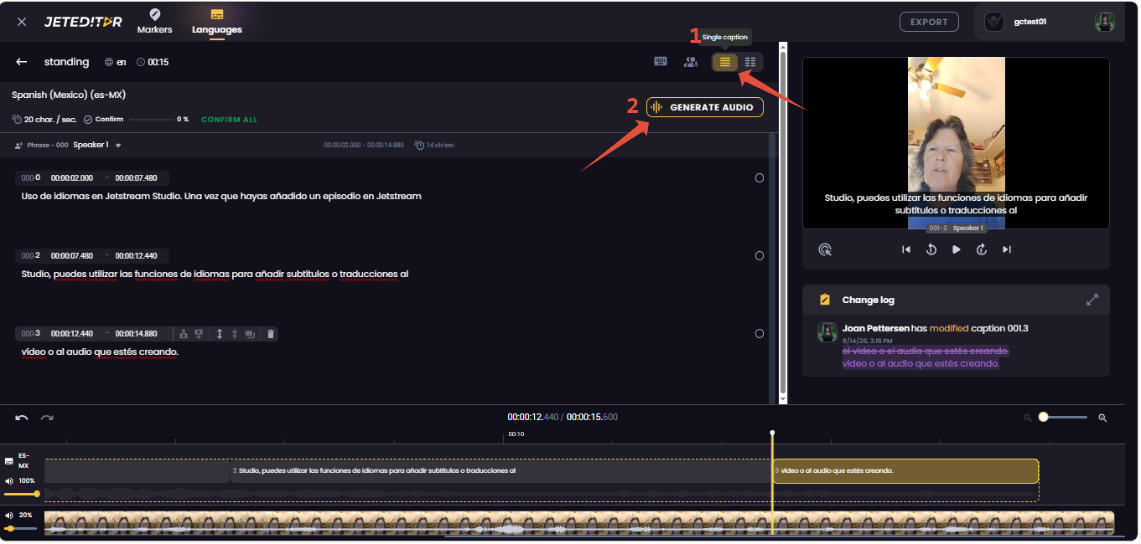
- When you are done, click on the Single caption icon on the upper right.
- Then click the Generate Audio button. A message: Audio generation process appears. Wait until it finishes.
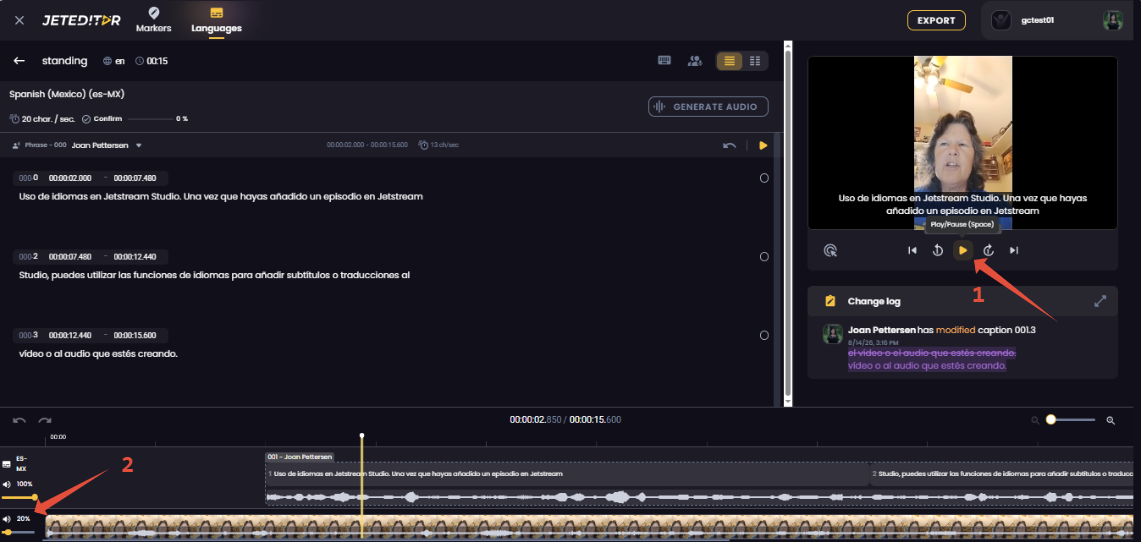
- Now you can click the Play icon below the main video or audio on the right side. It clones the original voice.
- With a dubbed translation, in the lower left, you can reduce the volume of the original voice in background to 0% or click on the speaker icon to mute it completely. The lower soundtrack is the original and the upper one is the translation.
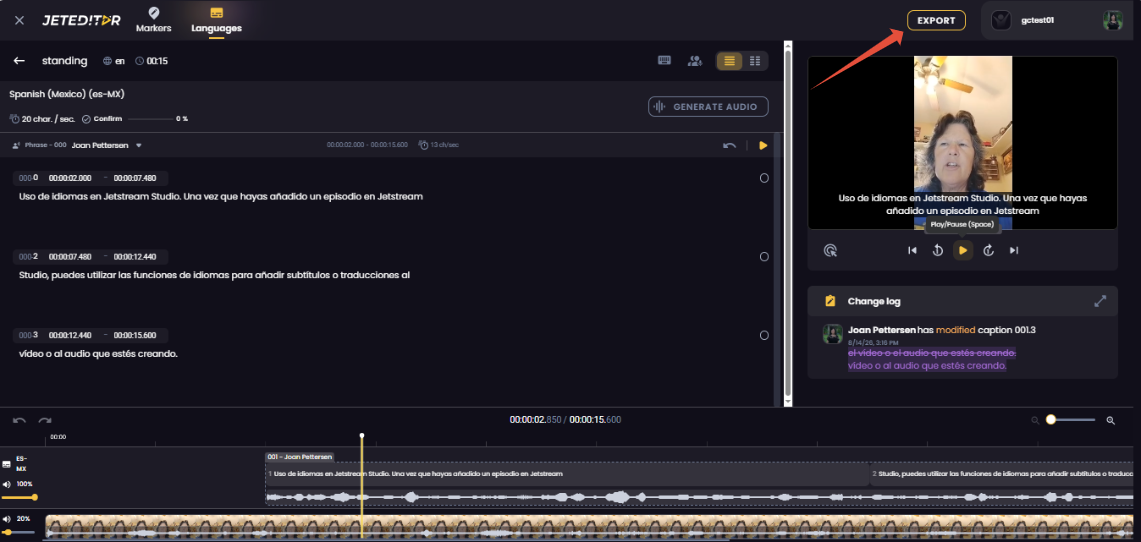
- Click on the Export button on the upper right and select: Save as new audio track.
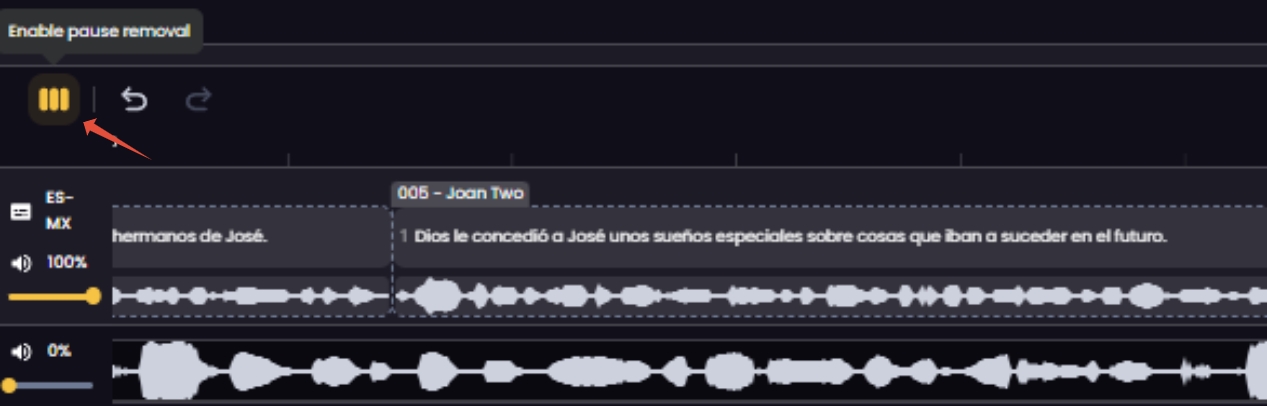
- You may receive a message with the option to Enable pause removal. You will click on the icon on the lower left if you choose to do so.
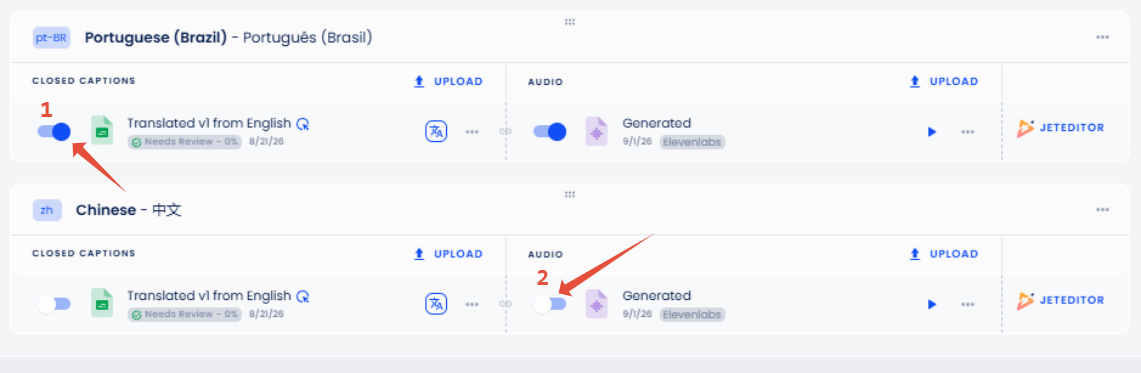
- Back on the Detailed media page, under Audio, it will say: Waiting until the process completes. Then it will say: Generated.
- Under Languages, under Closed Captions to the left of Translated or Generated, you can click and drag the Publish toggle to the right. It will turn blue. Across to the right side is another Publish toggle under Audio that you need to click and drag to the right. Note: If you have multiple versions of the same language, you can only activate the Publish toggle on one. You need to deactivate one before you can activate another one.
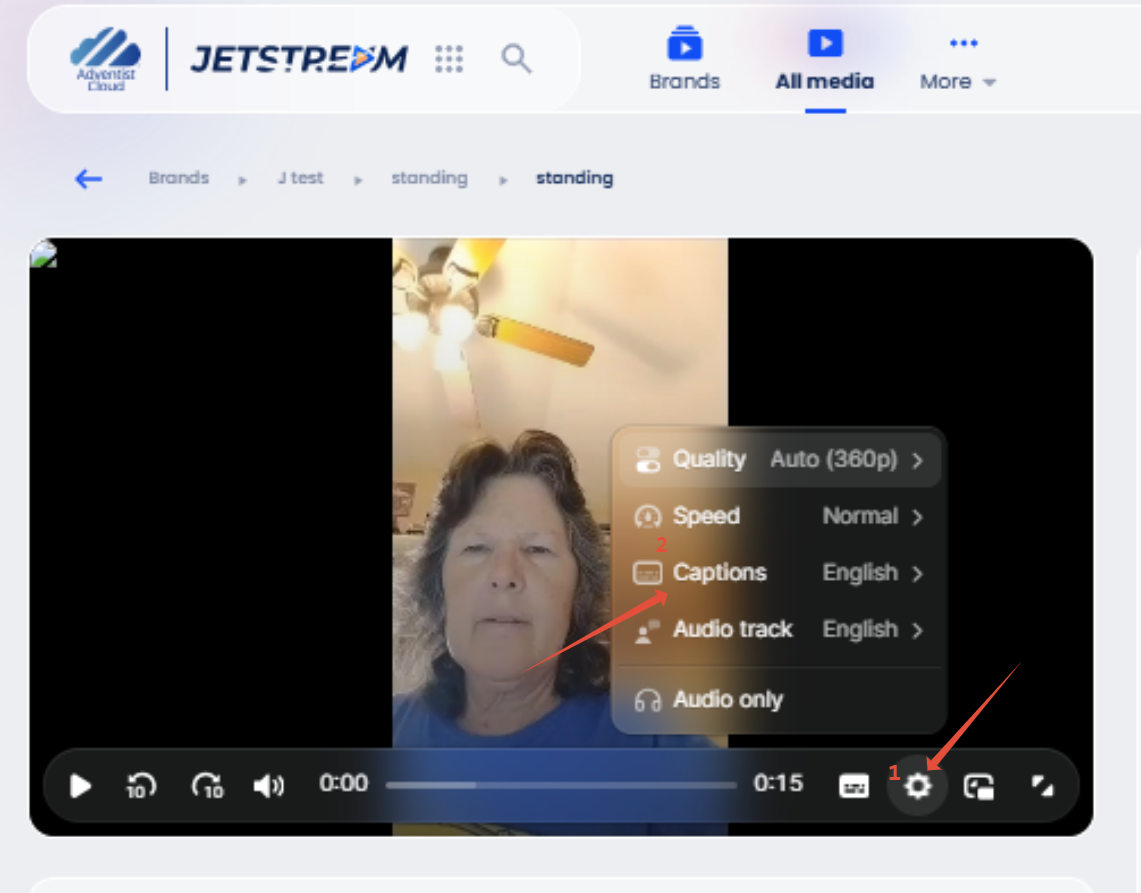
- In the Detailed media page, select the Settings of the main video or audio. If you select Captions, and wait a little, a list will appear and you can change the language. Note: It takes a couple of minutes for changes to appear in the player.
Add a different voice
If you want, you can dub a video or an audio with a different voice. Voices are always associated with People. You can find an existing person's voice or create a new one with a voice recording.
- Start at the detailed media page of the Episode of your choice following the instructions above for how to add a translation until the captions have finished processing and are translated. Stop before clicking the Generate Audio button. Now you are ready to select a speaker.
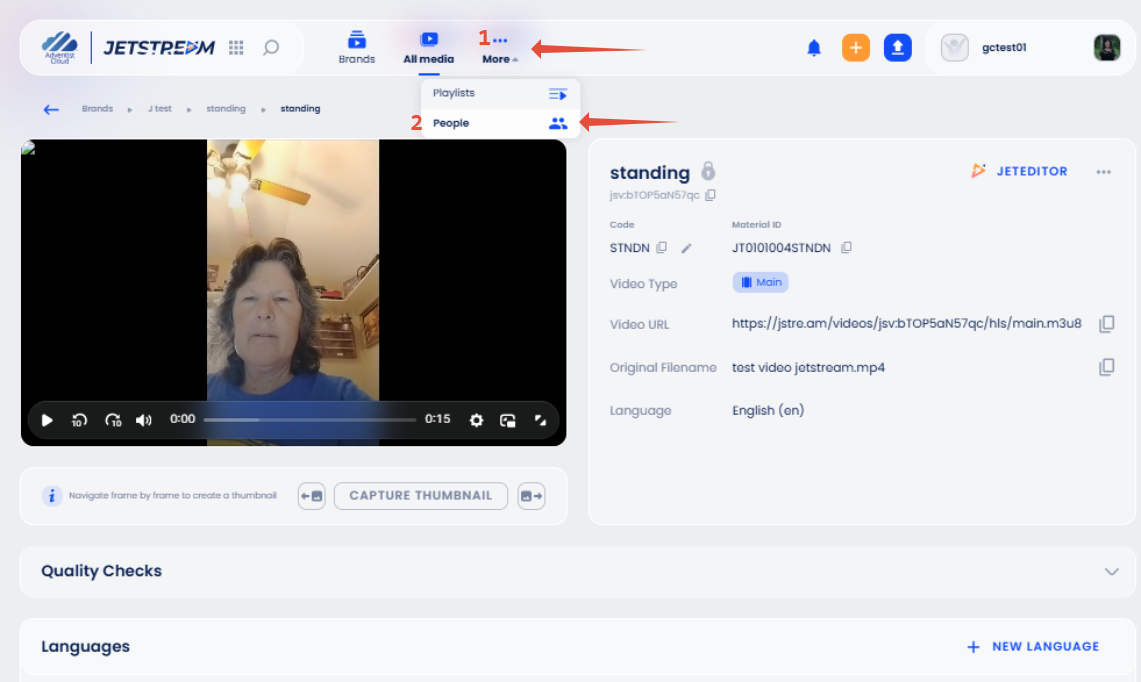
- At the top of the screen and expand More under the 3 dots.
- Then select the People option.

- If you want to add a new person, click on the link to add a New Person.
- Fill in the New Person modal box that appears and click the Create button.
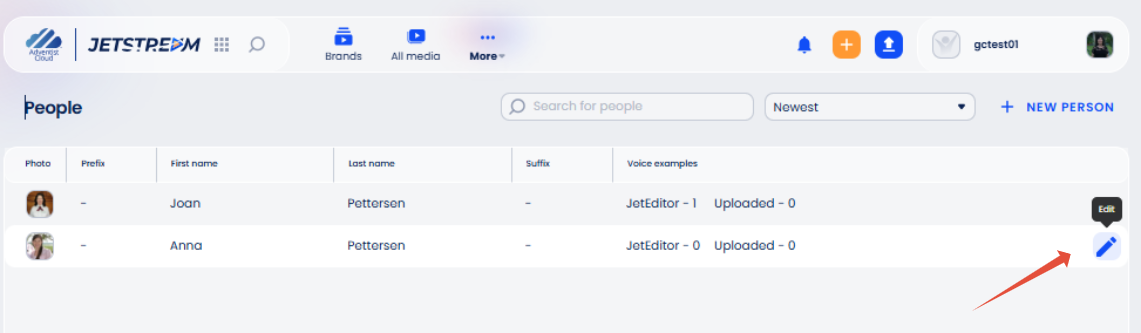
- Across from the person’s name, on the right side, click the Edit icon.
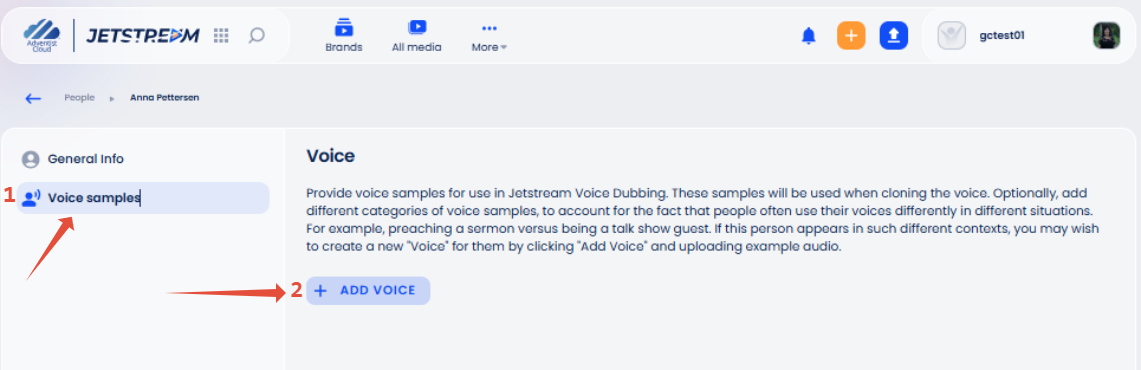
- Click Voice Samples on the left-side menu.
- If there is not a voice there, then click the Add Voice link.
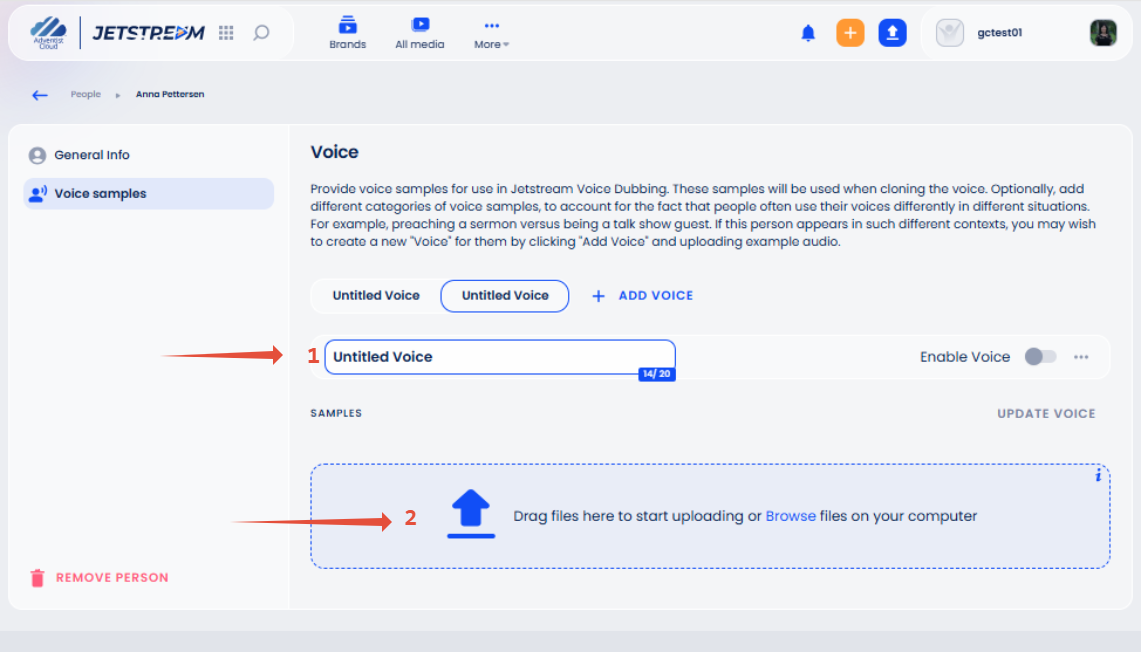
- Fill in the Untitled Voice field (up to 20 characters).
- Click in the box with the blue up arrow and add the audio file. A voice recording can be as short as a few seconds. A little longer recording will sound more like that person. It will say: Waiting while it processes.
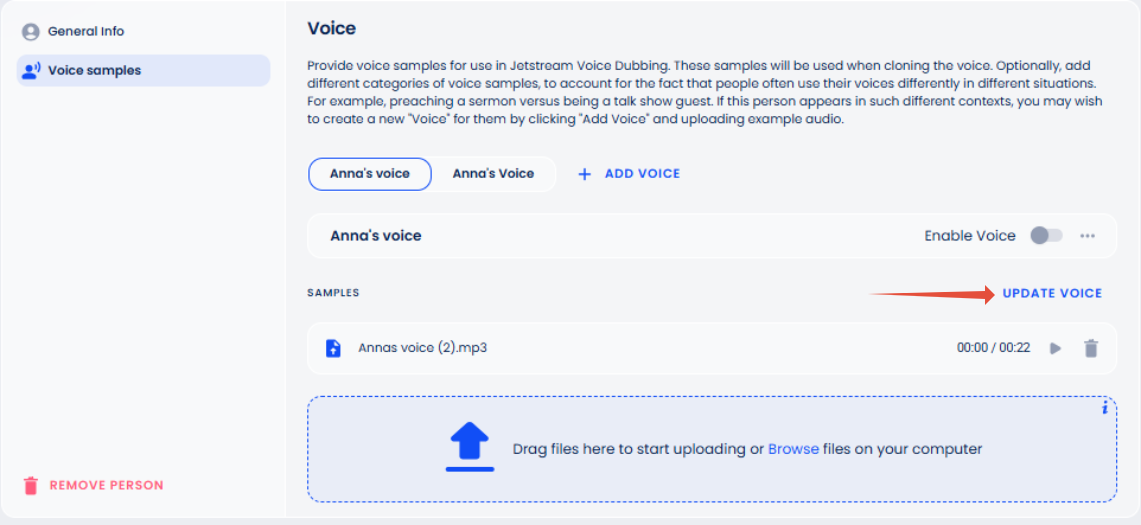
- Click on the Update Voice link across from Samples. This will enable the voice toggle just above so that it is blue now.
- Return to Brands at the top of the page and to the Brand and Episode you were working on and click the Open the detailed media page with the right-angle bracket under the main video on the right side.
- Scroll down and expand Other Languages.
- Click the Create Audio link on the right side of the language you are going to add a different voice to. This takes you to the JetEditor page.
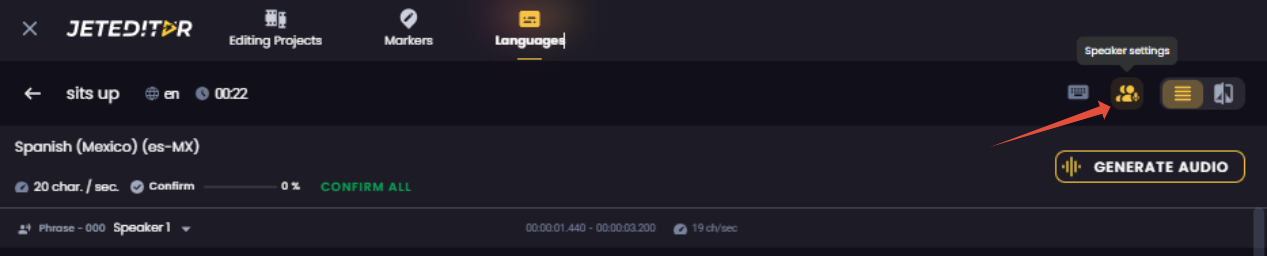
- Select the Speaker Settings icon.
- Click on Select a Speaker and select the new voice.
- Click the Close button on the modal box.
- Click the Generate Audio button. A message: Audio generation process appears. Wait until it finishes.
- Click the Play icon to hear the translation you created with a different voice. In the lower left, you can reduce the volume of the original voice in background to 0% or click on the speaker icon to mute it completely.
- You can Export, Enable pause removal and activate Publish toggles as done above for translations.
- Next you can use the instructions for How to publish a Video or Audio created in Jetstream. See the link below.